- "How do I create a vendor credit?"
- "How do I return a part to a vendor?"
Resolution Steps
- Go to Inventory → Vendor Bills.
- Click the + Vendor Bill button
- Toggle This is a Vendor Credit (top-right).

- Fill in the details: enter a Reference Number (e.g., invoice number) and Vendor (the vendor you’re returning to). Other fields are optional.

- Click Next.
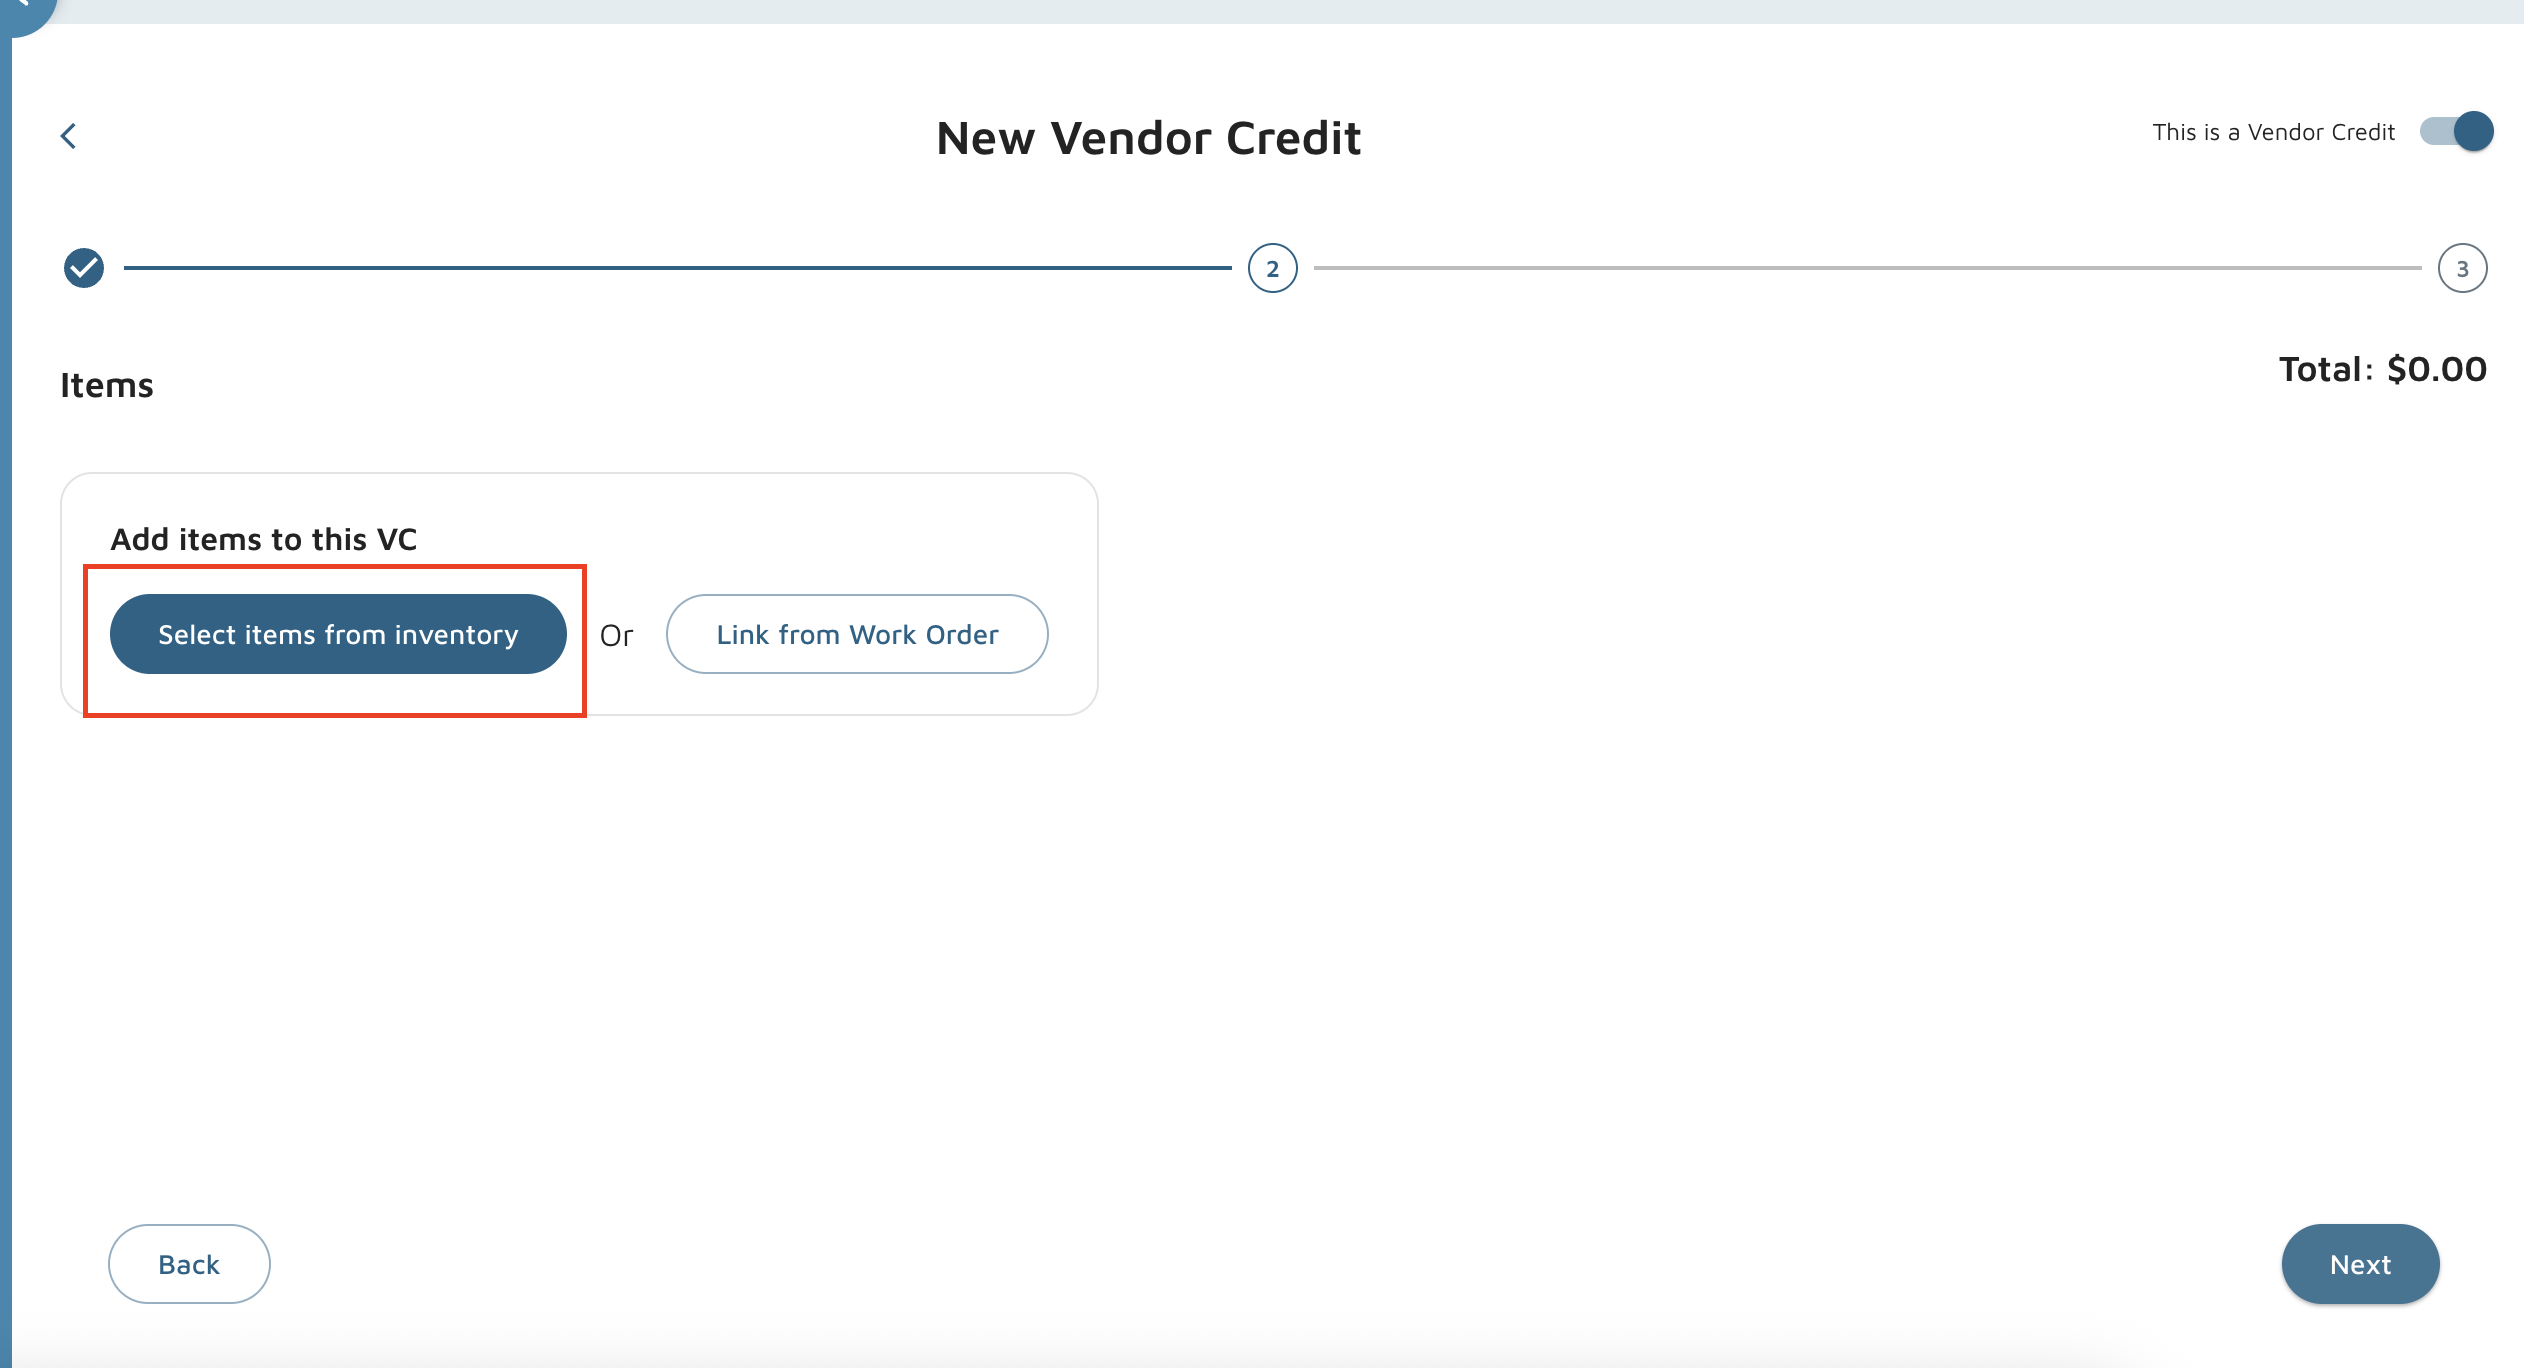
- Click on Select Items from Inventory.
- Scroll or search for the part/item you’re returning.
- Click Add for that item — the system will show how many are on hand.

- Enter the quantity you want to credit.
- Check Remove from inventory if you want the stock to be decreased.

- Click Add to add that line to the credit.
- Repeat steps 6–10 for any additional items.
- When all items are added, click Confirm.
- Add any internal notes or notes for the vendor if needed.

- Click Submit.
Quick checks: confirm the vendor is correct, quantities match what you’re returning, and “Remove from inventory” is selected if you want stock adjusted. Want this formatted as an SOP or checklist for a training doc? I can do that next.
Verification: On the menu bar, click on Inventory > Vendor Bills. The new credit should be there.